Friday, October 7, 2011

Pumpkin Pie: Paula Deen Style

HAPPY OCTOBER! [and happy Friday! :)]

I LOVE October. It's such a great month. It's the start of fall and fall is my favorite season. It just makes me feel so warm and cozy when I think of things like falling leaves and hot apple cider and pinecones and PUMPKIN PIE. I really, really love pumpkin pie. I look forward to it all year (and I was slightly disappointed when I realized you can buy frozen pumpkin pies any time you want from the grocery store. Lame.)
I've been wanting to make pumpkin pie from scratch for a few years but just haven't gotten around to it, so I decided that this year will be the year I perfect the pie.. I made a pumpkin pie at FSU a few years back and it was so awful we covered it in maple syrup to try to get it sweet enough. I must have left out the sugar? No idea. We'll just ignore that little cooking disaster.
This time I followed my dear Paula Deen's pie recipe. It's not the perfect pie recipe, it's a little more like pumpkin cheesecake, but it is darn delicious.

I bought a pumpkin (for $2, as you can see) from a little produce stand in North Georgia when I was up there flea-marketing. It's not a pie pumpkin, it's just a regular old pumpkin, so next time I think I'll try to get a true pie pumpkin.


And I hacked it all to pieces.


I cut it into 5 big pieces and then scooped out all the guts, making sure not to scoop out the pumpkin flesh. The seeds could be saved for cleaning and baking, but I wasn't feeling that much in the spirit yet and I just threw them away.


Then I put the pieces in a pan and roasted them for 45 minutes in a 350 degree oven.

They start to get mushy when they're done. They're kinda fun to play with at this point.


I scraped all the flesh away from the skin and into a bowl. It came off very easily. It got harder as the pumpkin cooled though.

And then I started to mash. (The masher is one of my great flea-market steals. I love it.)


I mashed for a very long time. Like a whole episode of Law & Order. I really wouldn't recommend it. The pumpkin was certainly mashed, but it was still kinda stringy, so having a food processor would have made it so much smoother. At this point I put the mashed pumpkin into a container and popped it in the fridge overnight, for no reason other than I was tired and wanted to finish cooking the next day.
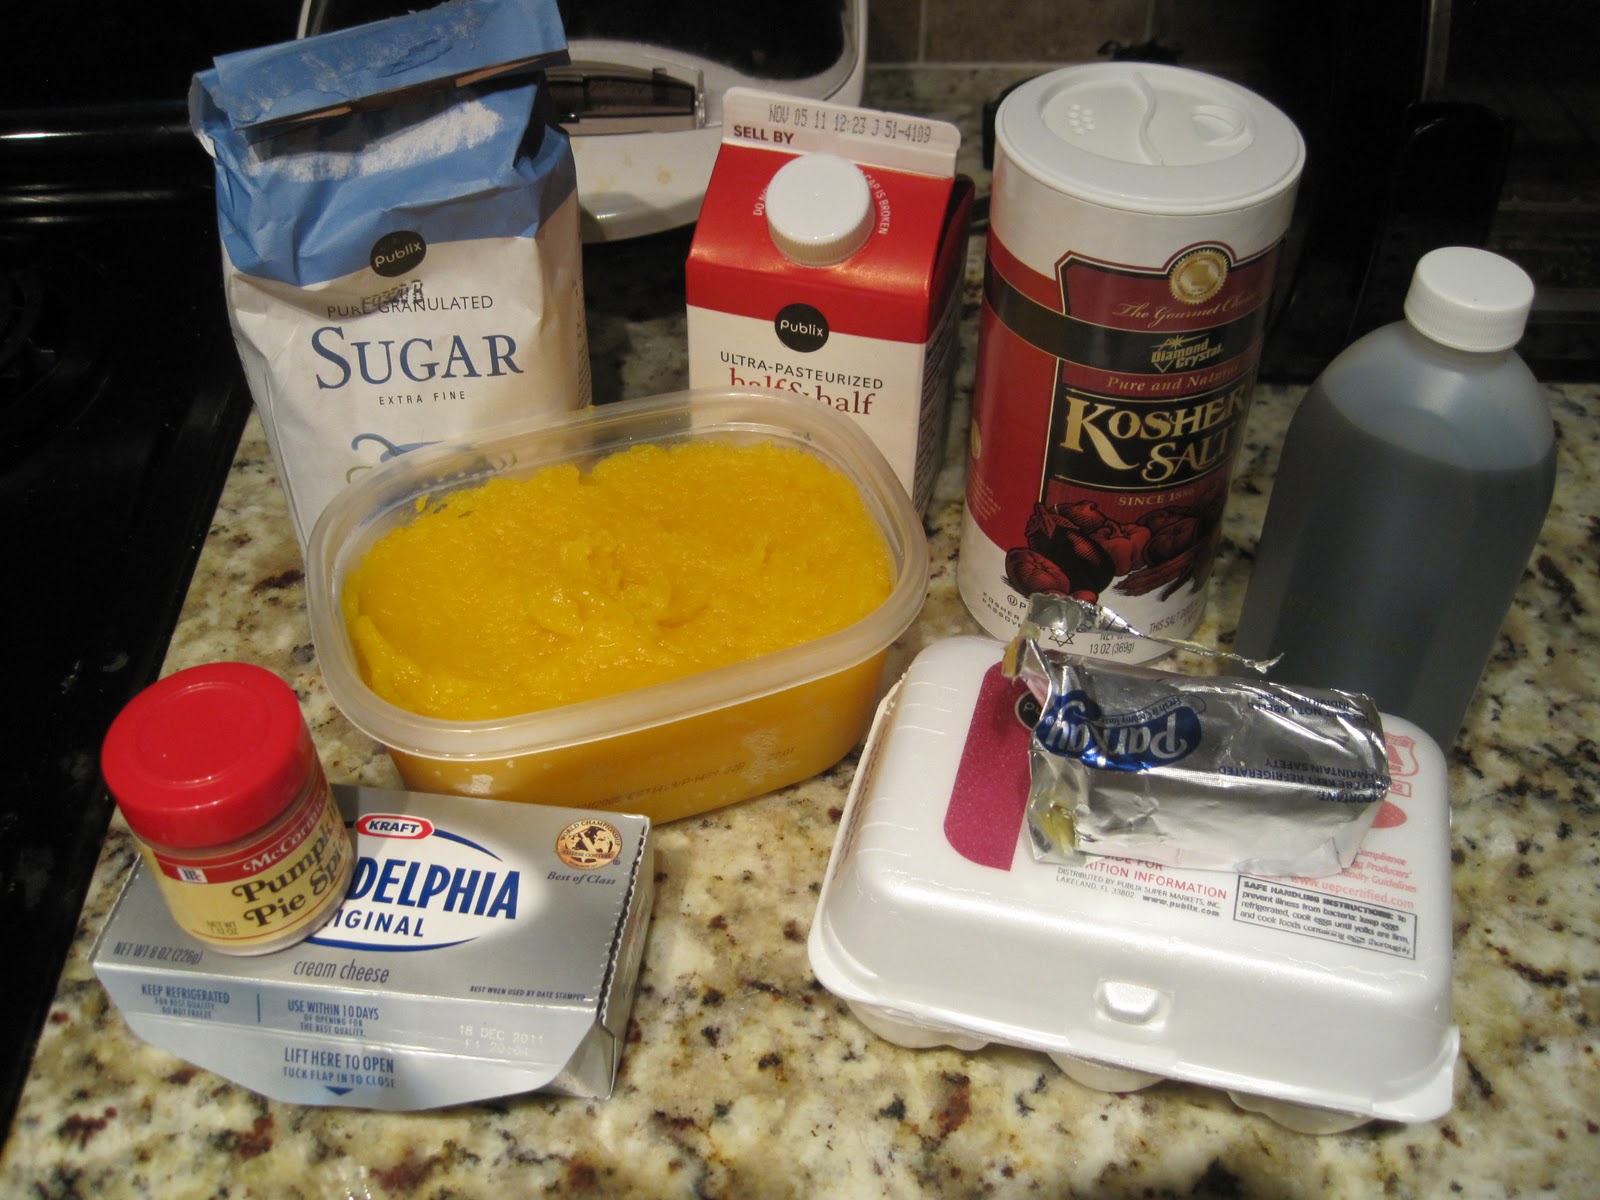
So the next day, I gathered all my ingredients. Paula, of course, uses individual spices, but I use pumpkin pie spice because I'm not Paula.

I put a whole package of cream cheese in a bowl (probably why it tastes like pumpkin cheesecake..) and beat it and then added the mashed pumpkin and beat until blended.


Mmm. pumpkin cream cheese. (Don't actually eat this. It's not that good yet. TRUST ME.)


And then I added the rest of the ingredients in the order the recipe calls for.

I got my pie shells ready, prebaking them a little.. I didn't make those from scratch, obviously.


And I poured the filling into the shells. This recipe makes a LOT of filling.

I baked them for about 50 minutes on 350. The whole apartment smelled like heaven.

This pie is good. It's not perfect, but it is very, very good. I think I'll try a Martha recipe next time....

Paula Deen's Pumpkin Pie Recipe

1 (8-ounce) package cream cheese, softened
2 cups canned pumpkin, mashed (I used the homemade stuff)
1 cup sugar
1/4 teaspoon salt
1 egg plus 2 egg yolks, slightly beaten
1 cup half-and-half
1/4 cup (1/2 stick) melted butter
1 teaspoon vanilla extract
1/2 teaspoon ground cinnamon (instead of this and the ginger, I used about a teaspoon of pumpkin pie spice)
1/4 teaspoon ground ginger, optional
2 pre-made pie shells
Whipped cream, for topping

Preheat the oven to 350 degrees F and prepare the pie shells according to their directions.
In a large mixing bowl, beat the cream cheese with a hand mixer. Add the pumpkin and beat until combined. Add the sugar and salt, and beat until combined. Add the eggs mixed with the yolks, half-and-half, and melted butter, and beat until combined. Finally, add the vanilla, cinnamon, and ginger, if using, and beat until incorporated.
Pour the filling into the warm prepared pie crust and bake for 50 minutes, or until the center is set. Place the pie on a wire rack and cool to room temperature. Cut into slices and top each piece with a generous amount of whipped cream.

I like how Paula calls for a generous amount of whipped cream. Who's surprised?


And now for a little bonus.. yay.
I knitted a sweater vest for a family friend's baby shower this week and made a fatal error. I was in a hurry to make it and didn't pay close attention to the pattern. I was supposed to start on size 4 needles and switch to size 7 after a few rows... and I never switched. I didn't realize what I'd done wrong until I finished the whole back and thought it looked a little slender. Babies aren't slender. So I had to reknit the entire back again. Luckily I caught it before I knitted the front too or I might have just killed myself.
To show you the difference between the two:

The one on the left is slightly more baby-shaped, don't you think?
 
And for the finished piece, which I'm absurdly proud of:
 
How stinking cute is that?! That will be one stylish baby.
The pattern is available here for free on Ravelry.


Tuesday, September 27, 2011

Chana Bhatura.. or something similar

Chana Batura is an Indian tomato and chickpea stew served with a big puffy bread-like item. It's one of the most delicious things I've ever eaten. My old boss was from India and when we would have meetings around lunchtime, we would stop at this little Indian restaurant just north of Atlanta and we'd have lunch. Every time I went I got a different meal because I just couldn't find anything I wanted to try twice.. until I tried Chana Batura. I started a new job this week and will miss my Indian lunches very much, so of course the only logical thing to do was learn to make it myself. I looked at a lot of recipes (and had to translate a few of them) and finally just decided to mush them all together and wing it... as usual.


I started off by browning some onions. In hindsight, I could've used a LOT more onions. I love onions. I let them brown up for a minute and then added a little minced ginger and garlic.

The spices were the hard part for me. I don't generally keep jars of coriander or cumin or really any spices used in Indian cooking. Luckily, spice companies know about people like me and sell Garam Masala, a mixture of various ground spices. It can include peppercorns, cloves, cumin, cinnamon, cardamom, nutmeg, star anise and coriander. I would have had only the peppercorns and the cinnamon. So I bought a jar. It may not be the exact proportions the recipe called for, but it'll be closer than if I had nothing.


So that's a lot of garam masala on the left mixed with some tumeric and cayenne pepper. I don't remember the exact amounts because I added some extra while it was cooking because I felt like it. Luckily cooking isn't as exact as baking.


I added the spices to the oil/onion/ginger/garlic mixture and let the spices toast a little.

Then I added a can of diced tomatoes. I'm not a big fan of chunks of tomatoes, so I probably would've been happier with a can of smaller diced tomatoes or just tomato sauce. Just kidding.. maybe.


I let the tomatoes cook for a while until the liquid thickened up a little and then added the drained chickpeas. I kept getting confused because every recipe I was finding was telling me to cook the chickpeas in a pressure cooker and that seemed odd. Then I finally stumbled across a recipe that explained that cans of chickpeas (I didn't realize they came any other way) are already cooked, but a typical Indian family would probably have bags of uncooked chickpeas. Since I didn't have uncooked chickpeas or a pressure cooker and I DID have a can of precooked chickpeas, it worked out perfectly.

This mixture just simmers for about 10 minutes or until the stew has thickened up. I wish I'd let mine thicken a little more. I don't even want to call it a stew because it's supposed to be a fairly dry meal.

Then serve it hot with bread. Bhatura is apparently the typical choice, but it's not something I'm willing to try making when a pita will suffice. (I'm sure there's an Indian chef rolling in his grave at that.) Bhatura is a flour and potato dough that's rolled out and fried. It puffs up and is served hot. When you puncture it, the steam inside escapes and it collapses in on itself. It's really very cool. But truly, a pita does taste delicious with it.
Although, served without Bhatura, I believe the name is Chana Masala? I'm clearly not an expert.

I might venture back up to that restaurant from time to time to eat the real stuff, but this version is so flavorful and easy to make that I think I'll survive.

Sunday, September 11, 2011

Tim's Apartment: From Bland to Big Band

My brother moved to North Carolina a few months ago and rented an apartment there. Between his obsessive cleanliness and the existing white-on-white-on-white color scheme, it looked much like a sterile hospital (his friend's words, not mine). That's really not his style, but he's not one to fix it if it isn't broken. So Mom and I decided that he and I needed a little brother/sister bonding time to make his home a little more homey.

The Before Pictures:
Luckily, when picking out his furniture, he chose these great chocolate brown leather pieces.

About as bland as it gets.


His bedroom. You can see his desk chair in the right side of the picture and his desk is on the wall opposite his bed. He doesn't have a headboard and although he does have a comforter, it's the one he had in college and it looks like it and he never uses it anyway.

The kitchen. He bought the table set. Quite out of place in an all white kitchen.


When I asked him what he was looking for in terms of style he said he wanted it to look like Barney Stinson's apartment, from How I Met Your Mother. Barney is his idol. I looked it up.

Source
So essentially the complete opposite of what his current apartment looks like. Great.
I took from that that he wanted it to look masculine, rich, uncluttered and mature.
He also added that he wanted a dry bar. Now, that I could do. After looking at probably 20 different styles, we found this bar to inspire us.

Source
He really liked the vintage aspect of it. Like you'd pour yourself a drink before going out to smoke a cigar. It helped solidify a nod towards vintage, big band-esque style for his place.
Then we started rounding up artwork. Again, after looking at lots and lots of options, we found an artist we both liked: B.J.Schonberg.

His stuff looks vintage while pushing the envelope of inappropriate, which makes it perfect for Tim.


Since getting color into his apartment was key, these were the wall colors we chose. (I adore Sherwin Williams paint.)
For the living room: Naval SW6678

For the kitchen: Sunflower SW6678


And for the bedroom: Lime Rickey SW6717

Tim wasn't 100% on aboard with all my color choices at first, but he trusted me enough to move forward.

The After Pictures:
The navy walls were a bold choice, but I'm glad we did it. Little details make all the difference. It's hard to tell in this photo, but the lamp is supposed to look like an old wooden tripod. It's very cool. With navy and white, the room could very easily have gone in a nautical direction, but the artwork and the accessories, like that lamp, keep it old school vintage.


We mostly just hung artwork on this side of the living room and the shelf could use an accessory or two, but it's a definite improvement. And there's his dry bar, complete with a few bottles of liquor, a bottle of wine and wineglasses. We made several changes to the bar, so I'll fill you in on that... in another post.
I love the color of the kitchen. It's so cheerful. That gameboard is actually from the 40's. I bought it at a vintage store for $12! All the pieces and directions were included, so if he ever wanted to, he could take it down off the wall and learn to play... but I doubt that will happen.

We flipped the bedroom completely around. I'm one of those people who believe that a bed should to be situated opposite the door and it wasn't, so that needed to change stat. We also added a headboard, nightstand and bookcase (you'll see in the next picture) in maple to match his existing desk. Tim chose the bedding, which pleasantly surprised me. We were already planning on painting the bedroom green, but in the picture attached to the comforter, the wall behind the bed was green, so I think that sealed the deal for him. At that point he could visualize how it would all look. 
The other corner of the room looks a little bland in comparison, but when you're in the room, it's not such a contrast. We added an IKEA bookcase to store Tim's textbooks and he set up his desk at the foot of his bed again.

And just because I LOVE seeing the before and after pictures together:


Seeing the pictures this way always makes me laugh because with the exception of the bedroom, it almost looks like the before pictures were taken in black and white because there was just NO color.

Although the colors are certainly bold, we kept them to only a few walls so it wouldn't be overwhelming. I'm quite pleased with how it turned out and, more importantly, Tim is too.

Thursday, September 1, 2011

The Viking Helmet: Crochet Pattern to Knit Pattern

I can think of almost nothing I'd rather do than knit. This isn't a joke. I'll stay up later than I mean to just to put one more row on a piece or I'll browse the internet for patterns on my lunch break. It's pretty serious, this relationship between knitting and me.
However, I have started cheating on knitting a little bit. I'm learning to crochet. (Don't tell my knitting needles...) I had to though! My dear friend Shannon is getting ready, any day now actually, to have a baby girl and when I found this pair of booties, I knew I had to learn to crochet, just to make them.
These above are a little better shaped than mine, shown below..

But I loved making them anyway. And I'm fairly certainly Shannon loved them too. They made their way into her maternity photo shoot! Lucky me. :)

So after surviving my first attempt at crocheting, I got gutsy and decided to try again, on this amazing pattern I found.
The pattern is available on Etsy here.

Well, after two or three or a hundred tries, I decided I was being too optimistic so early in my crocheting career and crocheting this hat wasn't going to happen.
Faithful knitting to the rescue. (Insert dramatic hero music here.)
This was my first attempt at converting a crochet pattern to a knit pattern. They aren't easily exchangeable, so I basically just applied the knit stitches I already know to create the look I wanted.

I am absurdly proud of the way it turned out.
I'm not sure how the band on the crochet pattern would've turned out, but ribbing is always a good band on a knit hat. And instead of crocheting popcorn, I used knit bobbles to create the rivets. I did end up crocheting the horns because those directions were easy enough to follow and it would've been harder to create a knit pattern for them. I used a decrease that I was already familiar with to create the crown.


All in all, my first try at knitting a crocheted piece was a success. While I should probably take away from this that knitting is my true talent and I should give up on crocheting, my mom would undoubtedly remind me that my first million or so attempts at knitting were complete failures, but I've just blocked them from my memory since getting better. I'm sure I have no idea what's she talking about. All of my knitting projects have been perfect since day one. :)

Friday, August 12, 2011

The Bucket List

I went home to visit my family this past weekend and at one point we were discussing Bucket Lists. (If you live under a rock, a bucket list is a list of things you want to do before you kick the bucket.) My dad mentioned something that for the life of me I can't remember, but it was fairly vague, something that would be hard to actually check off a list. I struggle with Bucket Lists for this reason. I'm list-checker. I need a point at which I can say "it's done". For example, I want to learn French, but at what point could I check Learn French off my list? There's not one. You can always learn more, become better.
However, the idea of a Bucket List is still a great one and so I have compiled a few things for my list.

1. Knit the Clara dress.
I am completely obsessed with this little dress. I think it is one of the most beautiful dresses I've ever seen. As of now the pattern is only available as a kit with the yarn, but I'm hoping someday they'll release the pattern alone. The kit can be found here for only $23.50. It just might be worth the splurge.

2. Learn to Tat.
Tatting is a technique for creating lace. It can stand alone, as a piece of art, or be added as a lace edging to something. I love how delicate they look, but how sturdy they are. I inherited several tatting shuttles, the instrument used to tat, from Aunt Mae's collection, so I'm halfway there.

3. Learn to Decorate Cakes.
Decorating cakes is an art form. My mom and I took a Wilton class years ago, but I was in middle school and don't remember much of it. I want to learn to make cakes like this one. There's no smooth frosting to worry about, it's all hidden! That's brilliant.

4. Host a Ball.
In 1966 Truman Capote hosted a Black and White masquerade ball at the Plaza Hotel that was considered the social event of the century. While I'm no Truman Capote and I don't have the Plaza Hotel nearby, I won't let that stop me. Extra points if I can make it a masquerade ball and/or raise money for a charitable organization.

5. Learn to Quill.
Much like tatting, quilling is a lost art. It's a method of curling small strips of paper and gluing them together to create designs. I just so happened to find this beautiful H and it's a perfect example of why I want to learn. The finished product is just gorgeous.

6. Knit the Hush-hush Slip.
Another dress I fell in love with the minute I saw it, but luckily this one is for grown-ups. This is a free pattern, thanks to Knitty.com, so the only thing stopping me is about 6 skeins of yarn and the patience to knit with size 2 needles.
7. Learn Embroidery.
I attempted to learn embroidery years ago, before I had the patience to do it right, and failed miserably. Now that I can appreciate the importance of reading the directions and actually following them, I think it's worth another go. There's a website I'm itching to try, SublimeStitching.com. They have some amazing, unique patterns that would be right up my alley. 
8. Finish my Hogwarts Cross Stitch.
I fully intend on finishing my Hogwarts cross stitch someday. It's a work in progress for sure.
Sneak Peek: I've gotten this far. It's moving very slowly, but I'll get there.

9. The Viking Hat
This bad boy's a new addition to my list. I found it on Pinterest.com and after a surprising amount of support from friends, immediately bought the pattern from Etsy. Want your own pattern? Now I just need to work on my crocheting skills. Luckily I already have a tonnn of gray yarn because it's my favorite.

10. Host a Family Olympics!
No clue who these people are, but they've got the right idea! This one won't be on my list long. I have somehow managed to convince my family to let me host a family olympics after Thanksgiving dinner this year. I'm keeping all the games secret so there's not an unfair advantage anywhere, but it's hard because I've come up with some GREAT challenges. If it goes well, maybe it'll become a new family tradition. Who couldn't use a few more family traditions?