When my great aunts passed away 25 years ago, their things were divided up among the family, like most things are and my family got a beautiful rocking chair.
Maybe other things too, I don't know. I love this rocker though. When I moved out last month, I took the rocker with me.
This poor rocker has hard a rough life. The tips of the legs have been dog-gnawed and it's been reupholstered several times. Most recently, it has spent the last year in storage. The fabric on it was rotting and I'm sure there was mold growing inside of it. I knew that it needed help before I could actually use it again. My mom suggested I reupholster it again, but this time take it down to its bones and start over. I'd never reupholstered anything before, but I decided to give it a shot.
Beware: this is a long post.
The first thing I did was remove all the tacks holding down the fabric. Keeping the old fabric in good shape was key because I would use it later as a template for the new fabric. I used a screwdriver to pry up the old tacks. Most of them came out easily because they're just glorified nails, but the occasional tack required more force and sometimes pliers.
After I got the tacks up I peeled away the fabric to get a good look at the cushion. I cut a piece of the cushion out to take to the store with me so I could buy a new one. I had no idea what this stuff was and what I needed. As it turned out, the not-so-helpful staff didn't know either. Luckily the store sold seat cushions made just for reupholstering. I just had to cut the cushion to the right size. More on that later though.
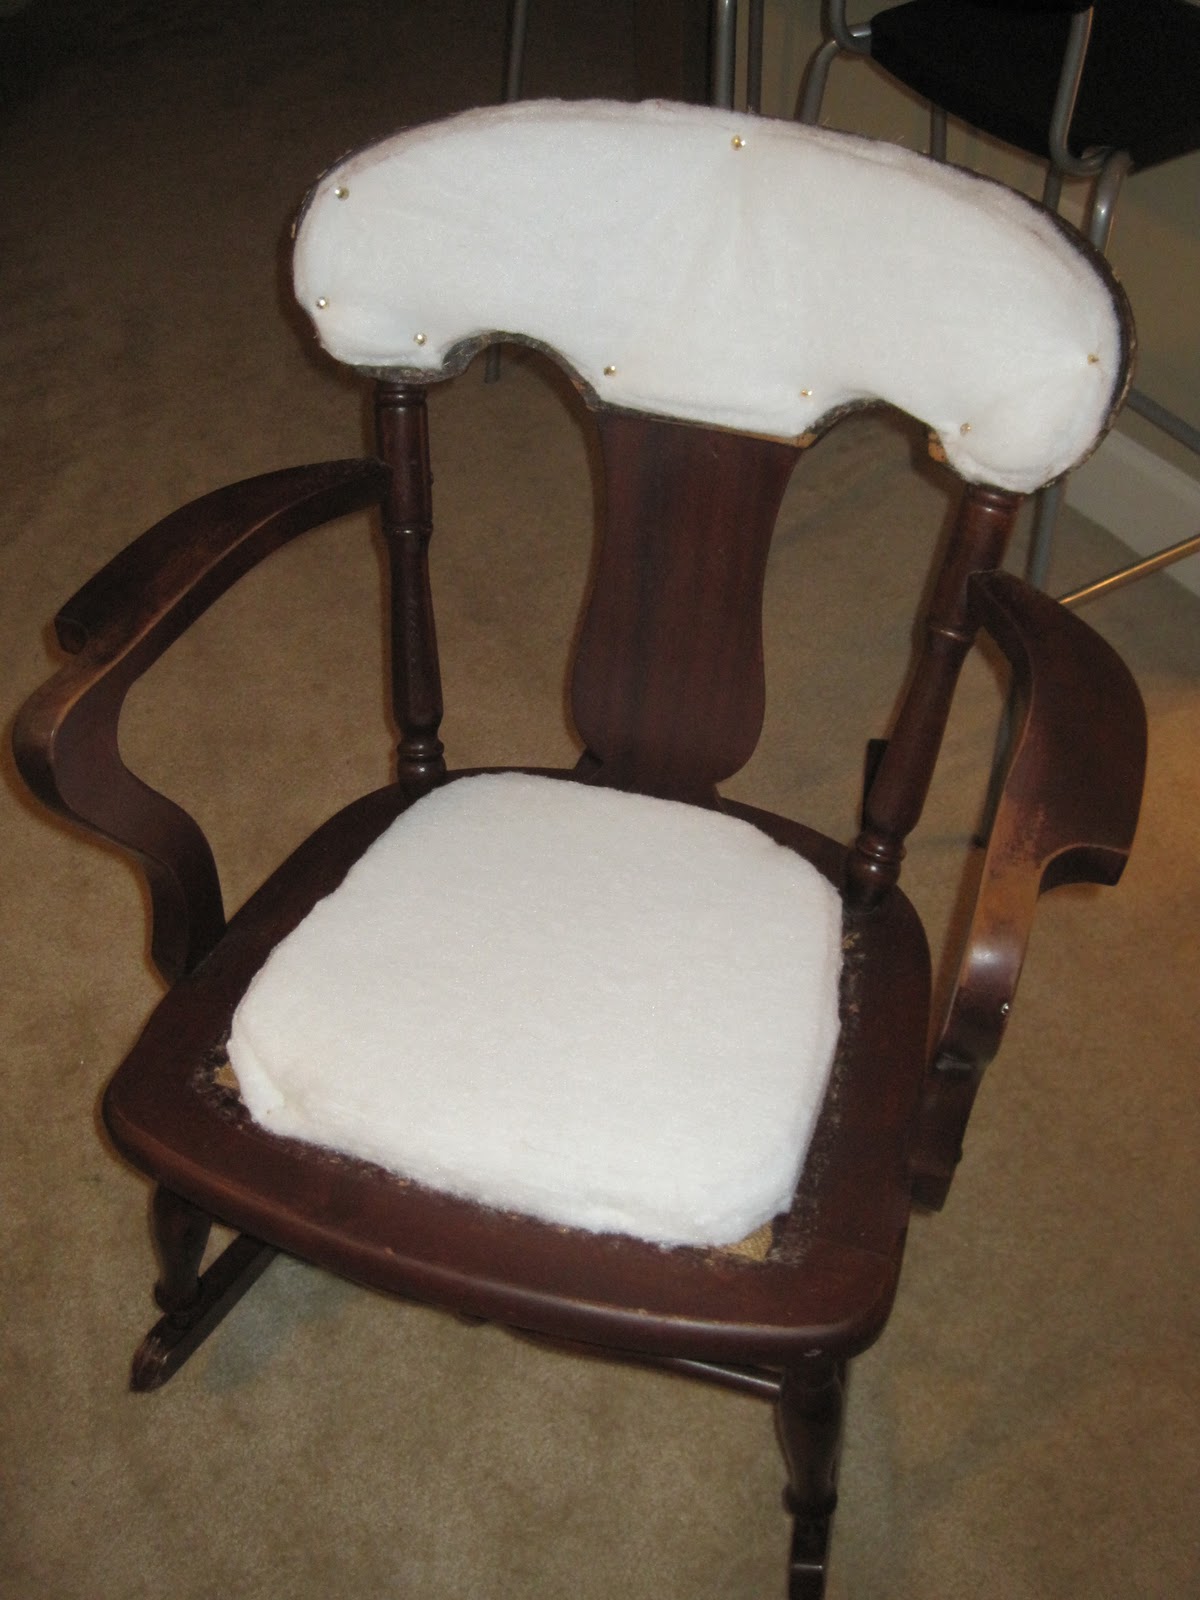
Once all the tacks were out, I took the cushions off and gave everything a good cleaning. (After this picture) I decided to leave the burlap and everything inside of it on the chair. Between the little I know of furniture construction and what I could feel through the burlap, it was protecting the seat supports. That was more than I knew I could handle and so I left them alone. I did spray it all down with Lysol though. No mold left on this baby.
To get the new cushion to be the right size, I laid the old cushion on top and simply traced it. Cutting it out was hard, but I used a old pair of scissors. Heavy duty scissors would be nice in this case.
I used the same method to cut out the cushion for the back, although I used batting for the back since it was much thinner than the seat cushion and I could buy it in lengths instead of seat-shaped squares. Once I made sure they were the right sizes, I attached the cushions to the chair with little nails. I tried to attach them in unobtrusive places so it wasn't obvious when the chair was done. (I did go back and take out some of the tacks holding the back cushion in place because even though I tried, I could still see them when I attached the fabric.)
I have no idea why this picture is sideways, but it's really irritating me.
I used the old fabric as a pattern for the new fabric. After laying the fabric down and moving the "patterns" around until I liked the placement, I traced them and cut them out.
A word about fabric selection- Picking out the right fabric for something like this is key. Not only the design and the colors, but the fabric itself. I plan on using this chair quite a bit so I knew I needed a heavier fabric that could withstand daily use. This paisley is actually an upholstery fabric, so it's perfect for my rocker. Upholstery fabrics are typically a little pricier than other fabrics because they're built so tough, but I knew my rocker wouldn't require a lot of yardage and I found a half yard of this paisley in the remnant stack for only $3.50. Talk about a steal.
The pattern is obviously important too though. My rocker is very dainty and feminine and I passed on several great fabrics before finding this one. It wouldn't have looked right with a geometric design or a something equally modern or masculine. Plus I just love paisley. It was meant to be.
When tacking down the new fabric, I used the same method the old one had been attached with: fold under the edges and nail down with an upholstery tack. I worked in a star pattern (much like removing a tire) to make sure that the fabric was evenly attached and taut. The number of tacks used to hold down the fabric is up to you, but I just kept adding tacks until I felt it was securely in place and the edges looked good. (I added way more than are seen in this picture. It's an in-progress picture.)
Choosing tacks is just as important as choosing a fabric. Think of it as jewelry on your chair. The store I went to had more than ten different tack options. Some were round and silver, some round and gold, some square, some shaped like little pyramids. I chose round and bronze. They matched my fabric and my vision for my chair perfectly. They look like they've been on my rocker forever.
When attaching the fabric around curves on the chair, I had to snip the fabric. This allowed the fabric a little extra give when turning corners. If you have a corner to navigate, don't fear snipping, just don't snip too much. You don't want to see that cut when you're done.
This is me showing off my lack of perfection. It's hard to tell in this picture, but the tacks come across the front of the chair and then swing out to follow the top edge across the back. My fabric didn't want to help me make that transition pretty and sometimes you just have to fudge it. If I hadn't shown it off just now, I know no one would have ever noticed that, but I know it's there. It's the beauty of doing it myself.
My beautiful, newly reupholstered rocking chair. I could not love it more. It's far from perfect, but it was my first attempt at reupholstering, and I didn't get fed up and throw it away. I call that a success. Now it's sitting beside its little table ready for a cocktail and a good book. Perhaps Pride & Prejudice?


No comments:
Post a Comment